So, you've got yourself an iPad 10th Generation, a fantastic device that bridges the gap between a tablet and a laptop. But to truly unlock its potential, especially for typing-heavy tasks, connecting and using an external keyboard is a game-changer. Whether you're drafting emails, writing reports, or just chatting with friends, a physical keyboard transforms your iPad into a more capable productivity powerhouse. No more awkward on-screen tapping – just fluid, comfortable typing.
This guide is your comprehensive roadmap to setting up and mastering external keyboards for your iPad 10th Gen. We’ll dive into the specific Apple options designed for your device, explore the vast world of third-party Bluetooth keyboards, and arm you with the knowledge to troubleshoot common issues and maximize your typing experience.
At a Glance: Key Takeaways for Your iPad 10th Gen Keyboard Journey
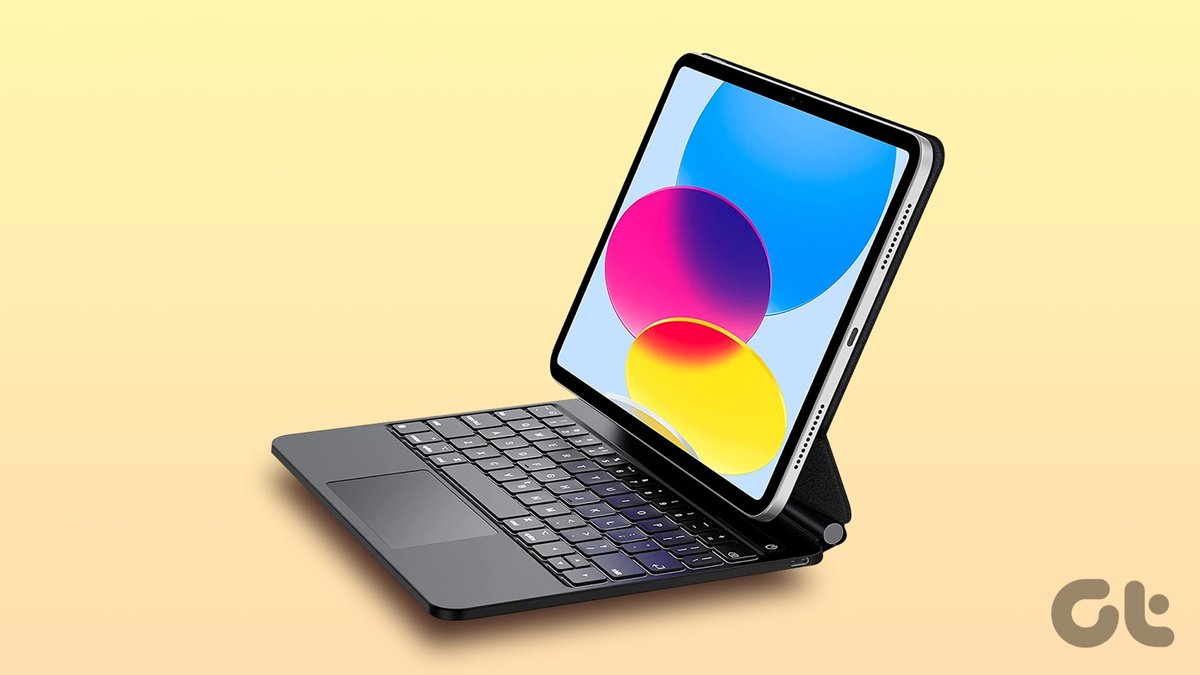
- Apple's Best Fit: The Magic Keyboard Folio is Apple's official, magnetic Smart Connector keyboard designed exclusively for the iPad 10th Gen.
- Universal Alternative: Any Bluetooth keyboard, including Apple's standalone Magic Keyboard (wireless), can connect to your iPad 10th Gen.
- Smart Connector Advantage: Keyboards like the Magic Keyboard Folio connect instantly via the iPad's Smart Connector – no pairing, no charging (separately).
- Bluetooth Basics: For Bluetooth keyboards, you'll pair them through your iPad's Settings app, just like any other wireless device.
- Productivity Boost: External keyboards open up a world of iPadOS keyboard shortcuts, trackpad support, and multitasking capabilities.
- Stay Updated: Always keep your iPadOS software current for the best compatibility and performance.
Finding Your Perfect Typing Partner: Keyboards for iPad 10th Gen
When it comes to outfitting your iPad 10th Gen with a physical keyboard, you essentially have two main categories: Apple's dedicated solution that leverages the Smart Connector, and the broader universe of Bluetooth keyboards. Understanding the differences will help you make the best choice for your workflow and budget.
The Smart Connector Advantage: Apple's Magic Keyboard Folio
For the iPad 10th Gen, Apple designed a specific accessory to integrate seamlessly: the Magic Keyboard Folio. This isn't the same as the Magic Keyboard for iPad Pro or the older Smart Keyboards. It's built specifically for your device, connecting via the Smart Connector and offering an immediate, reliable typing experience without the need for Bluetooth pairing or separate charging.
The Magic Keyboard Folio stands out for its two-piece design, featuring a detachable keyboard and a back panel with an adjustable kickstand. This modularity offers flexibility, allowing you to use just the back panel as a stand for watching videos, or snap on the keyboard when it's time to get to work.
The Versatility of Bluetooth: Third-Party & Apple's Wireless Keyboards
Beyond Apple's dedicated Smart Connector option, the world of Bluetooth keyboards is wide open. This includes Apple’s own standalone Magic Keyboard (the wireless one you might use with a Mac), as well as a myriad of third-party options from brands like Logitech, Brydge, Satechi, and many more.
Bluetooth keyboards offer immense flexibility. They often come in various sizes, styles, and price points. Many third-party options are integrated into cases, providing protection and a keyboard in one package. The trade-off? They require their own power source (batteries or rechargeable), and you'll need to manually pair them via Bluetooth settings.
Why Other Apple Keyboards Aren't the Right Fit for the iPad 10th Gen
It's worth noting that while Apple offers several other excellent keyboards, most are not compatible with the iPad 10th Gen due to differing Smart Connector placements or physical designs:
- Smart Keyboard & Smart Keyboard Folio: These older models were designed for earlier iPads and iPad Air/Pro generations and lack the correct Smart Connector configuration for the 10th Gen.
- Magic Keyboard (for iPad Pro/Air): While a premium experience, this keyboard is engineered for iPad Pro (11-inch and 12.9-inch) and iPad Air (4th, 5th, and M2 generations) which have different physical dimensions and Smart Connector locations. Placing your 10th Gen iPad into one of these would be like trying to fit a square peg in a round hole – it simply won't work.
Understanding these distinctions ensures you invest in the right keyboard that will actually work with your iPad 10th Gen, preventing frustration down the line.
Plugging In and Powering On: Connecting Your Keyboard
Getting your keyboard up and running is typically a straightforward process, whether you're using Apple's Magic Keyboard Folio or a universal Bluetooth keyboard. Let's walk through each method.
Connecting the Magic Keyboard Folio (for iPad 10th Gen)
The Magic Keyboard Folio is designed for instant connection, leveraging the Smart Connector.
- Attach the Back Panel: First, align and attach the microfiber side of the back panel of the Magic Keyboard Folio to the back of your iPad. It will snap into place magnetically.
- Attach the Keyboard: Next, align the three magnetic contacts on the keyboard's edge with the Smart Connector on the side of your iPad (when held in landscape mode). The keyboard will magnetically snap into position and connect instantly.
- Position for Typing: Adjust the stand on the back panel to prop up your iPad to a comfortable viewing angle. This stand is part of the back cover, offering multiple angles.
- Start Typing: Open any app where you can type (Notes, Pages, Safari search bar, etc.), and you're ready to go!
No pairing codes, no toggling Bluetooth – just snap it on and type. When you’re done, you can fold the keyboard over the screen for protection or detach it entirely.
Connecting Any Bluetooth Keyboard (Including Apple's Wireless Magic Keyboard)
If you've opted for a third-party Bluetooth keyboard or Apple's standalone Magic Keyboard, the connection process involves a few more steps, but it's still quite simple.
- Prepare Your Keyboard:
- Power On: Ensure your Bluetooth keyboard is charged or has fresh batteries and is powered on.
- Pairing Mode: Put your keyboard into pairing mode. This is often done by pressing a dedicated Bluetooth button, holding down a specific key combination (like Fn + Bluetooth symbol), or sometimes just by turning it on for the first time. Check your keyboard's manual if you're unsure. A small indicator light will usually blink to show it's ready to pair.
- Access iPad Settings: On your iPad, tap the Settings app icon.
- Enable Bluetooth: In the Settings sidebar, tap Bluetooth. Make sure the Bluetooth toggle switch at the top is turned On. Your iPad will start searching for nearby discoverable Bluetooth devices.
- Select Your Keyboard: Under the "Other Devices" section, you should see your keyboard's name appear. Tap on its name.
- Enter Pairing Code (If Prompted): Your iPad might display a numeric code. If it does, type this code onto your physical keyboard and then press the Enter or Return key on the keyboard. This confirms the pairing.
- Note: Some simpler Bluetooth keyboards might connect instantly without a code.
- Confirm Connection: Once successfully paired, your keyboard's status will change to "Connected" under "My Devices."
- Start Typing: Open any typing app and begin using your keyboard. To save battery, remember to turn off your Bluetooth keyboard when it’s not in use.
This process is a general guide; for specific quirks of a particular third-party keyboard, always refer to its instruction manual. If you're looking for guidance on choosing the right iPad accessories beyond just keyboards, we have a helpful guide on that too.
Navigating Your Typing Experience with iPadOS
Once your keyboard is connected, it’s time to unlock its full potential with iPadOS. An external keyboard doesn't just replicate your computer's typing experience; it enhances your iPad's functionality in unique ways.
Typing and the On-Screen Keyboard Dance
With an external keyboard connected, iPadOS typically hides the on-screen software keyboard, giving you more screen real estate. However, there are times you might need it – perhaps to access emojis, dictate text, or use special characters not easily found on your physical keyboard.
- Bringing Up the Software Keyboard:
- Magic Keyboard Folio: Long-press the downward-facing arrow button (often found in the lower-right corner of the keyboard layout), then tap "Show Keyboard."
- Bluetooth Keyboards (and older Apple keyboards): Tap the keyboard icon in the lower-right corner, then "show keyboard."
- Dismissing the Software Keyboard: Once it's on screen, you'll see a dismiss button (often a keyboard with a downward arrow) in the lower-right corner of the software keyboard itself. Tap that to hide it again.
Unlocking Productivity with iPadOS Shortcuts
This is where an external keyboard truly shines. iPadOS boasts an impressive array of keyboard shortcuts that mirror many Mac shortcuts, allowing you to navigate, edit, and interact with apps much faster.
- Universal Shortcuts:
- Command + H: Go to the Home screen.
- Command + Space Bar: Open Spotlight Search (great for finding apps, files, or searching the web).
- Command + Tab: Switch between recently used apps.
- Command + C / V / X: Copy, Paste, Cut (text, images, files).
- Command + Z / Shift + Command + Z: Undo / Redo.
- Command + A: Select All.
- Hold Command: To see available shortcuts for the app you're currently in, simply hold down the Command key for a few seconds. A handy overlay will appear.
- Text Editing Shortcuts:
- Option + Left/Right Arrow: Move cursor word by word.
- Shift + Option + Left/Right Arrow: Select text word by word.
- Command + Up/Down Arrow: Move cursor to the beginning/end of a document.
These are just a few examples; exploring mastering iPadOS keyboard shortcuts can dramatically boost your efficiency.
Beyond Typing: Trackpads, Mice, and Your iPad
Many external keyboards (like the Magic Keyboard Folio and some third-party options) include an integrated trackpad. This transforms your iPad into an even more laptop-like device, offering precise cursor control and multi-touch gestures. If your keyboard doesn't have a trackpad, you can still connect a Bluetooth mouse or trackpad separately through the same Settings > Bluetooth menu.
- Trackpad Gestures:
- Two-finger scroll: Scroll through content.
- Pinch to Zoom: Magnify content.
- Two-finger swipe (up/down/left/right): Navigate through apps or views (depending on the app).
- Three-finger swipe up: Go to the Home screen.
- Three-finger swipe left/right: Switch between apps.
- Three-finger swipe up and hold: Access the App Switcher.
These gestures significantly enhance navigation and interaction, making your iPad feel incredibly intuitive.
Personalizing Your Typing: Keyboard Settings
iPadOS offers various settings to customize your keyboard experience:
- Go to Settings > General > Keyboard.
- Here, you can adjust settings like:
- All Keyboards: Add new keyboard languages, enable/disable Auto-Correction, Check Spelling, Enable Caps Lock, etc.
- Hardware Keyboard: Adjust key repeat rate, key repeat delay, and even remap modifier keys (Caps Lock, Control, Option, Command) to different functions. This is incredibly useful for tailoring the keyboard to your personal preferences or specific app workflows.
Mastering Multitasking with a Physical Keyboard
An external keyboard, especially when combined with a trackpad, makes iPadOS multitasking features like Split View and Slide Over incredibly efficient.
- Dock Access: Press Command + Spacebar to bring up Spotlight, then type the name of an app to quickly open it or drag it from the search results into Split View.
- App Switching: Use Command + Tab to cycle through your open applications rapidly.
- Dragging and Dropping: With a trackpad, dragging and dropping text, images, or files between apps in Split View becomes as easy as on a desktop.
Leveraging these features with your keyboard can make your iPad 10th Gen a true productivity powerhouse. For a deeper dive into your device's capabilities, check out our full review of the iPad 10th Gen.
Keeping Things Running Smoothly: Essential Tips
A few simple practices can ensure your keyboard experience remains seamless and trouble-free.
Updates & Power
- Keep iPadOS Updated: Always update your iPad to the latest iPadOS version. Apple frequently releases software updates that improve compatibility, performance, and introduce new features for external accessories. Outdated software is a common culprit for unexpected issues.
- Charge Bluetooth Keyboards: For Bluetooth keyboards, keep an eye on their battery levels. A low battery can lead to intermittent disconnections or unresponsive keys. Charge them regularly or have spare batteries on hand if they use disposables. The Magic Keyboard Folio, connected via Smart Connector, draws power directly from your iPad, so you don't need to charge it separately.
Managing Multiple Connections (and Disconnections)
- Single Bluetooth Keyboard: iPadOS typically supports only one Bluetooth keyboard connection at a time. If you have multiple paired keyboards, your iPad will connect to the last one used or the one you select.
- Forgetting a Device: If you want to permanently disconnect or "forget" a Bluetooth keyboard (e.g., if you're selling it or no longer use it), go to Settings > Bluetooth, tap the 'i' icon next to the keyboard's name, then select "Forget This Device." This ensures your iPad won't try to connect to it automatically in the future.
- Proximity: For Bluetooth connections, keep your keyboard and iPad reasonably close to each other, ideally within 30 feet (10 meters), and avoid major obstructions.
When Things Go Sideways: Troubleshooting Common Keyboard Issues
Even the most reliable tech can occasionally act up. Here’s a quick guide to resolving common keyboard problems.
My Keyboard Isn't Detected or Responding
- Check Power: For Bluetooth keyboards, ensure it's powered on and fully charged/has fresh batteries.
- Magic Keyboard Folio: Ensure it’s properly aligned and firmly connected to the Smart Connector on your iPad. Sometimes a slight jiggle or re-attachment can fix it.
- Bluetooth Pairing Mode: Make sure your Bluetooth keyboard is in pairing mode (check its manual).
- Toggle Bluetooth: On your iPad, go to Settings > Bluetooth, turn Bluetooth off for a few seconds, then turn it back on.
- Restart Everything: Restart both your iPad and your keyboard. A simple reboot can often clear minor software glitches.
- Clean Contacts: For Smart Connector keyboards, ensure the three magnetic contacts on both the keyboard and the iPad are clean and free of debris. Use a soft, lint-free cloth.
I Can't Pair My Bluetooth Keyboard
- Forget Previous Pairings: If you've previously paired the keyboard with another device (or had issues with the iPad), it might still be trying to connect elsewhere. Go to Settings > Bluetooth, tap the 'i' next to the keyboard's name (if it appears), and select "Forget This Device." Then, try pairing again from scratch.
- Reset the Keyboard: Many Bluetooth keyboards have a reset function or a way to clear all previous pairings. Consult your keyboard's manual for specific instructions.
- Interference: Move away from other wireless devices that might be causing interference (e.g., Wi-Fi routers, other Bluetooth devices). If you're encountering persistent issues with other wireless devices, you might want to consult a broader guide on troubleshooting common Bluetooth issues.
My Keyboard Keeps Disconnecting
- Proximity and Interference: Ensure your iPad and keyboard are close to each other and there are no strong sources of interference.
- Battery Level: A low battery in a Bluetooth keyboard is a frequent cause of disconnections.
- Software Updates: Confirm both your iPadOS and (if applicable) your keyboard's firmware are up to date. Some third-party keyboards have companion apps to update their firmware.
- Re-pair: Sometimes simply forgetting the device and re-pairing it can establish a more stable connection.
If you’ve tried all these steps and still have issues, it might be a hardware problem with the keyboard itself, or in rare cases, your iPad. Consider contacting the keyboard manufacturer’s support or Apple Support.
Making the Most of Your iPad 10th Gen with a Keyboard
Your iPad 10th Gen, paired with an external keyboard, is more than just a tablet with keys; it's a versatile tool for productivity, creativity, and communication. By understanding how to connect, use, and troubleshoot your keyboard, you empower yourself to tackle a wider range of tasks, from detailed document creation to rapid email responses.
Experiment with keyboard shortcuts, explore trackpad gestures, and customize your settings to truly make the experience your own. Whether you're a student, a professional, or simply someone who enjoys the tactile feedback of physical keys, an external keyboard elevates your iPad 10th Gen into a more complete mobile workstation. We encourage you to delve deeper into the capabilities of your device and its accessories, perhaps exploring the best productivity apps for iPad to further enhance your setup. Happy typing!
Untuk pemahaman lebih lengkap, baca panduan utama kami: iPad 10th Gen keyboard guide